 |  |  |
 |  |  |
 |  |  |
 |  |  |  |  |  |  |
|
|
PROJECT FILES |
|
|
|
|
|
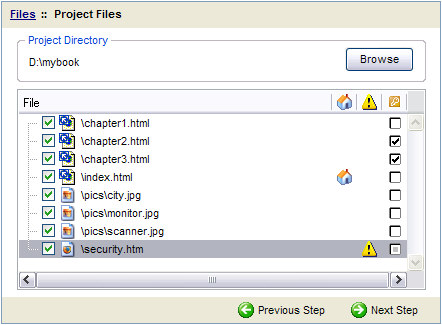
The Project Files screen is where you choose your Project Folder (aka Project Directory) and make file selections. |
| By default, all recognized file types will be included. If you would like to exclude any files, un-check the box to the left of the filename. | |
|
TIP |
Don't forget that all the files for you e-book (pictures and HTML) must be within ONE folder. We'll be referring to this as your Project Folder. |
|
Selecting your HOME Page |
| Begin by clicking the Browse button. Locate your
Project Folder (the
folder containing all of your e-book files). Click OK and
your file list will appear. Locate the HTML file which will be your Homepage. This will be the first page your visitor sees when they open your e-book.
|
The Right-click option list |
|
|
Click on the file so
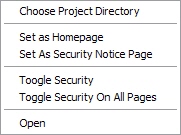
the row becomes highlighted. Right-click on the file,
and an options list will appear. Choose Set as Homepage. A picture of a house will appear to the right of the file name indicating it has been selected. |
|
Selecting a Custom Security Notice Page |
If you will be using your own custom Security Notice Page you must select it here. This is optional and will be discussed in more detail later. |
|
|
Right-click on the HTML file and
choose Set As Security Notice Page in the option list. An exclamation mark will appear to the right of the file name indicating it has been selected. |
|
Securing your Pages |
If you are using Password Protection or Advanced Authentication security features, you must select which pages you want to secure. (Security methods will be discussed in more detail in a later step). |
|
|
If you are only securing some pages in your e-book, Right-click each file name, and select Toggle Security. You can also check the box to the far right of each file name. |
| Optimizing your HTML Content |
|
|
|
|
The Content Optimization
screen will provide assistance if your HTML pages are not displaying
correctly in the viewer. This feature is useful for users who have
converted their HTML pages from a different source (such as a Microsoft
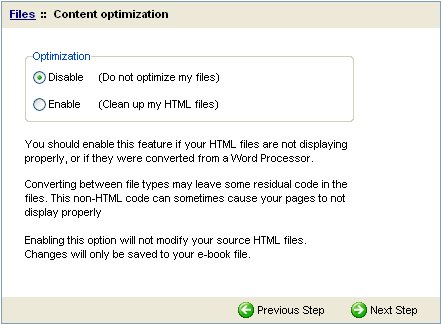
Word file, or PDF Presentation). Converting your HTML pages from a different format may leave some 'junk' code in the files. This non-HTML code can cause your pages to not display correctly. Optimizing will not fix poorly written or incorrect code! Select Clean up my HTML files to have
your pages optimized. |
|
TIP |
When using optimization, the original HTML files in your Project Folder will not be modified. Changes will only effect the pages of your generated e-book file. |
| Adding Custom Fonts |
|
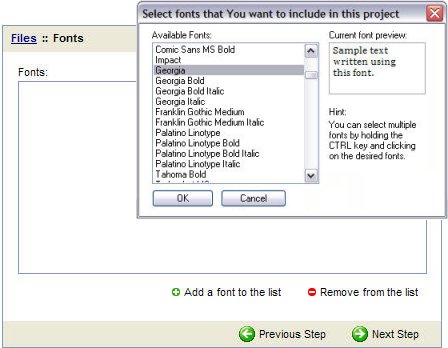
Click add a font to the list and browse through the fonts currently installed on your computer. Click to highlight the font you want to install
(a preview is shown in the top
right of the window). Click OK and the font will appear in the list.
|
|
|
TIP |
If you are using only standard windows fonts in your project, you can skip this step. |
|
|
GENERAL PROJECT INFO |
APPEARANCE |
|
Contact us online
 Copyright © 2000-2025 by eBookGold. All rights reserved. |


